Hello all,
I've had a few question as to how I paint the flesh / skin on my survivors and zombies. I use the same technique on both, as I envision the zombies being predominantly recently dead and not half rotten beings (if you want to paint your zombies really quickly, have a look at this guide to painting them in just ten to twelve minutes).
I guess I was asked not because I acheive anything close to a Golden Demon standard but because I can acheive a skin tone that looks alright very quickly,
So without further ado, here is a quick guide to how I paint skintones:
First, get some lovely miniatures - I've chosen Bob (HFH056, more pictures here) and Felicity (HFA086 (c), more pictures of her here) from Hasslefree. Great sculpts and Bob shows a ton of skin whereas Felicity decent clothing reveals a normal amount (well, not normal for Kev White female miniatures).
All pictures are clickable to show the details better.
1.
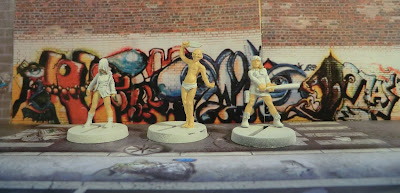
The lovely couple (and their zombie friend, who will soon disappear as I got sidetracked painting her) has been undercoated white.
I almost always use white as it produces nicer colours with less effort.
2.
The first layer of Vallejo Basic Skintone (70815) has been applied - diluted to avoid removing too many details.
3.
3. The first of several layers of diluted Vallejo Game Color Lavado Wash Acrylic Paint Fleshtone Shade 73204 (thats a long name!).
If you are a talented painted you would have accomplished this by carefully blending the fleshtones, but for the likes of me washes helps do the job my skills cannot accomplish. Several layers to avoid too hefty blobs and that "dipped" look. Although for zombies this is a minor problem - they serve to be killed, rapidly, so just give them a hefty layer.
4. Another layer of Vallejo Fleshtone.
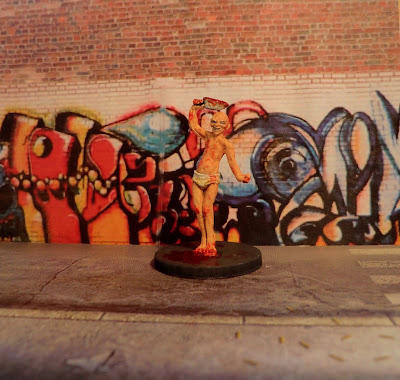
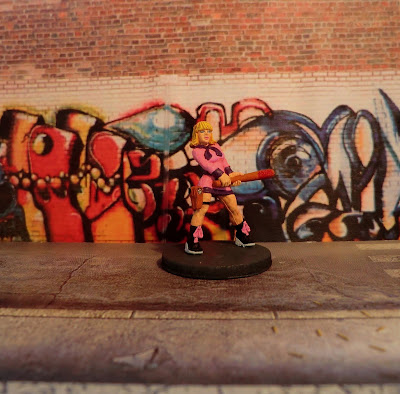
6. The finished result - quick, but effective.
I've had a few question as to how I paint the flesh / skin on my survivors and zombies. I use the same technique on both, as I envision the zombies being predominantly recently dead and not half rotten beings (if you want to paint your zombies really quickly, have a look at this guide to painting them in just ten to twelve minutes).
I guess I was asked not because I acheive anything close to a Golden Demon standard but because I can acheive a skin tone that looks alright very quickly,
So without further ado, here is a quick guide to how I paint skintones:
First, get some lovely miniatures - I've chosen Bob (HFH056, more pictures here) and Felicity (HFA086 (c), more pictures of her here) from Hasslefree. Great sculpts and Bob shows a ton of skin whereas Felicity decent clothing reveals a normal amount (well, not normal for Kev White female miniatures).
All pictures are clickable to show the details better.
1.
The lovely couple (and their zombie friend, who will soon disappear as I got sidetracked painting her) has been undercoated white.
I almost always use white as it produces nicer colours with less effort.
2.
The first layer of Vallejo Basic Skintone (70815) has been applied - diluted to avoid removing too many details.
3.
Another layer of Vallejo Basic Skintone . I've also at this stage painted Felicity's hair and the eyes on both.
I used to do these last but after discussing the matter I've changed to painting them first.
This has the advantage that you are not "bored" with the miniature yet (which you very well may be at the end of painting it) and thus have fresh eyes. You are also more likely to redo the eyes if you are not close to finishing the miniature as it is quite easy to redo at this stage - just do another layer of flesh tone.
Also, no matter how great your paint job, if the eyes are not great the entire mini will suffer so it is worth getting right. I'm not as skilled at this as I would like (too old and too impatient) but I try my best.
3. The first of several layers of diluted Vallejo Game Color Lavado Wash Acrylic Paint Fleshtone Shade 73204 (thats a long name!).
If you are a talented painted you would have accomplished this by carefully blending the fleshtones, but for the likes of me washes helps do the job my skills cannot accomplish. Several layers to avoid too hefty blobs and that "dipped" look. Although for zombies this is a minor problem - they serve to be killed, rapidly, so just give them a hefty layer.
4. Another layer of Vallejo Fleshtone.
5. A few touchups to the skin and the other details have been added. This is where you should apply highlights etc, but I am normally satisfied with the results at this stage and call it quits. Primarily because I'm looking forward to adding blood, etc. All the fun stuff!
6. The finished result - quick, but effective.
Anyways, thanks for reading - if you found the post interesting then any
comments, questions, or tips (commercial clicks :-)) are greatly appreciated!
Until the next time; stay safe and prepare to slaughter Zombies!
All the best,
Kasper


Lovely job and a great tutorial too.
ReplyDeleteThanks Michael - I hope someone can use it :-).
ReplyDeleteAll the best,
Kasper
Lovely job and a great tutorial too.
ReplyDeleteBob The Robber